
This fun project is made from a 6 x 9 inch clasp envelope! You just fold it in half, cut off the closed end, and decorate with pieces of coordinating patterned paper. It's a great way to use up scraps! The possibilities are endless. You could add gift cards, photos, note cards, or use it as a receipt holder in your purse! I got the idea from "roxyfur" on You Tube (Dollar Tree Envelope to Adorable Card Holder). Mine, however, is a little bit different.
Here are the written instructions for my version:
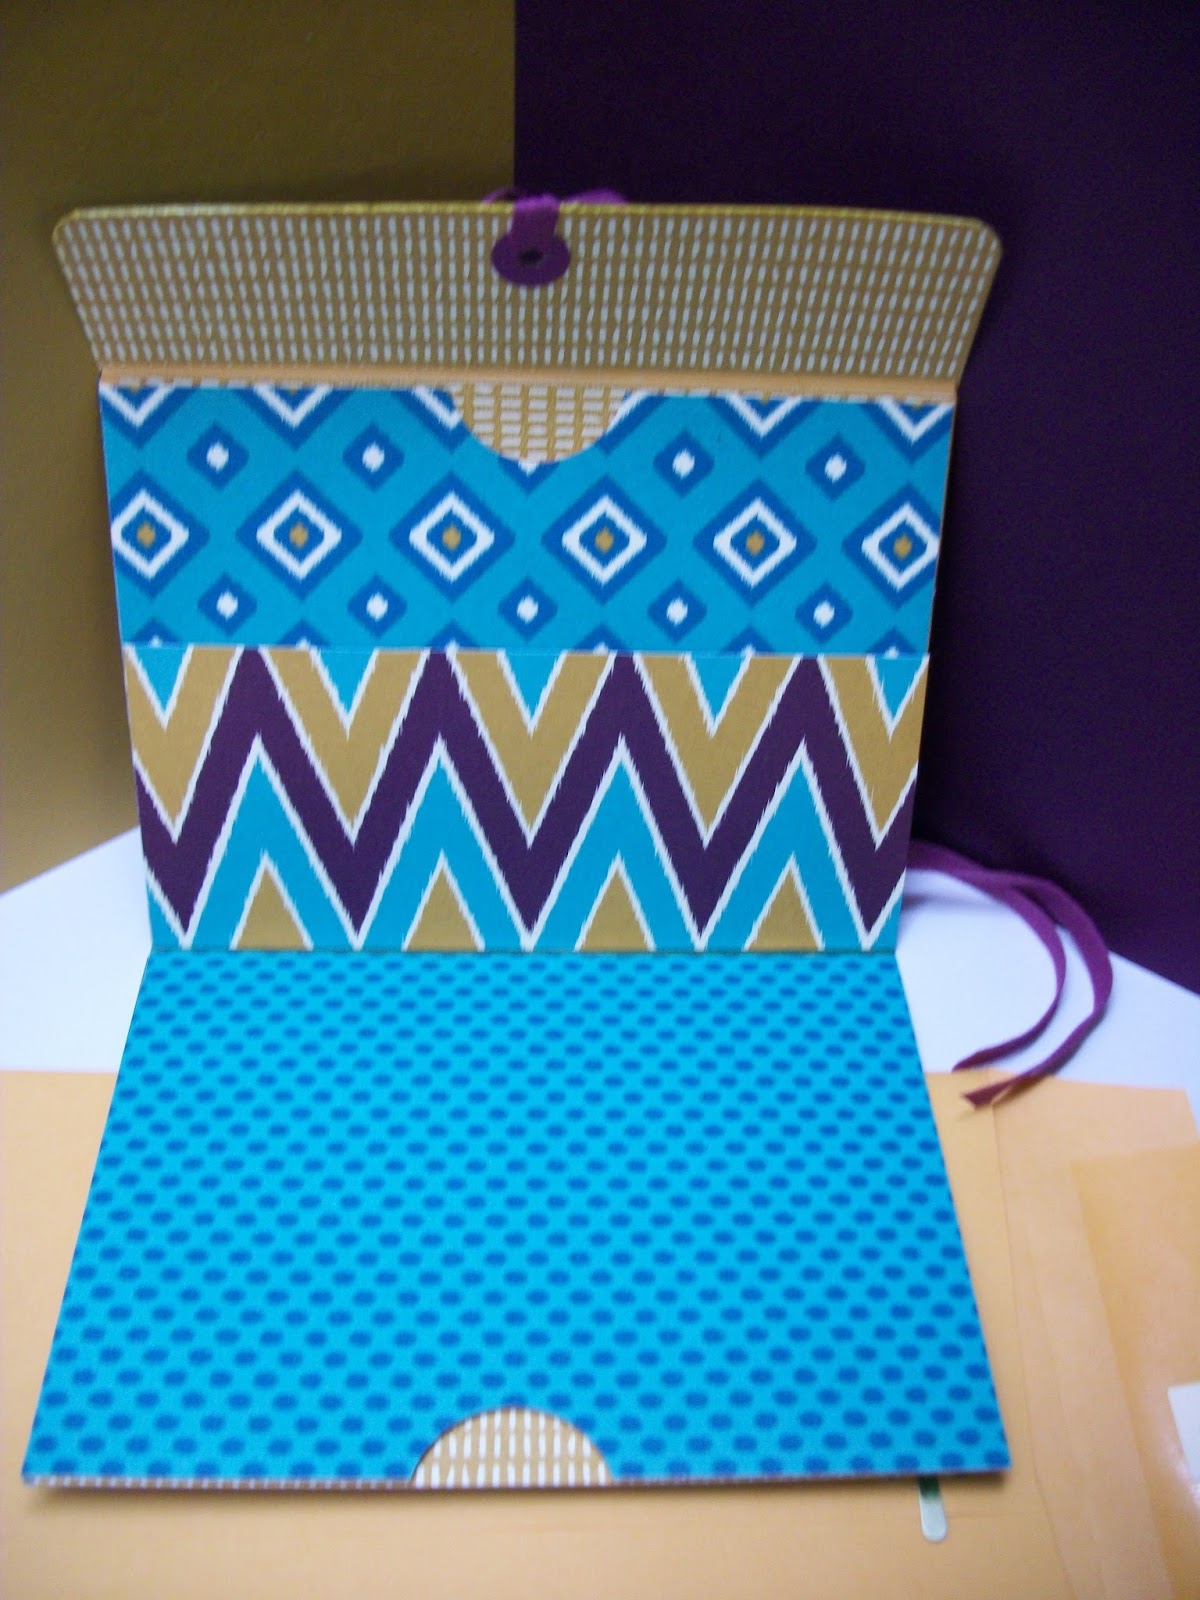
Envelope Card
Supplies Needed:
1 6 x 9 inch Kraft clasp-close envelope
4 pieces designer paper cut 4-3/8 x 6 inches (for panels)
2 pieces designer paper cut 2 x 5-7/8ths inches (for inside pockets)
1 piece of designer paper cut at 1-1/2 x 6 inches (for outside flap)
1 piece designer paper cut at 1-3/8 x 6 inches (for inside flap)
1 piece of designer paper cut at 2-1/2 x 6 inches (for inside pocket)
Various width 6 inch strips (for decoration)
Instructions:
1. Cut 1/8th inch off the closed end of the clasp envelope.
2. Fold down the flap on top but do not close shut.
3. Fold envelope in half making a 4-1/2 x 6 inch “wallet.”
4. Attach the 4 panel pieces to the inside and outside of wallet. This is a good way to use coordinating papers, mix and match. Tip: When attaching the inside top piece be sure you don’t glue it too close to the top and glue the opening shut. There is a slight taper of the envelope here, but rather than cut the paper to fit, just don’t glue it too close to the top.
5. Using a 1-1/4 circle punch or similar cut a half circle in the tops of both inside pockets. (This will make it easier to access the pockets.)
6. Attach the 2 inch x 5-7/8th inch strips to the inside of each pocket. (If you don’t mind the kraft envelope showing you can skip this step.)
6. Attach the 2 inch x 5-7/8th inch strips to the inside of each pocket. (If you don’t mind the kraft envelope showing you can skip this step.)
7. Attach the 2-1/2 x 6 inch piece of paper to the inside right pocket in the center, making sure to only adhere the edges. This will make an additional small pocket on the inside of the wallet.
8. Attach the flap pieces to the flap of the envelope on each side. Rather than cutting the strips to match the taper of the flap, just glue each side on and then use a corner rounder to round the corners. Punch a hole in the center of the flap, adding hole reinforcers if desired, and string ribbon through the hole to tie the wallet closed. (Alternatively you could use Velcro or magnets.)
9. Decorate the outside of your envelope/wallet anyway you desire. Add coordinating strips of cardstock, stamped images, etc.
More Pictures:


No comments :
Post a Comment