My passion is making cards and other paper projects and sharing my ideas and projects with you.
Friday, April 29, 2016
Congrats Grad!
It's that time of year again when we need graduation cards! Even when I don't think I know anyone who is graduating, I'm always surprised by an announcement in the mail. Kids just grow up so fast! Anyway, here is a card I made this year using school colors. I combined three previous Paper Pumpkin kit stamps and supplies to make this card. The "Congrats" is from the Seriously Amazing kit from August 2014, the stars are from the Wish Big kit from July 2014, and the hat and "Grad" stamps are from the March 2016 kit. It could, however, be reproduced with other dies and stamps from your stash.
Finished card size is 5-1/2 x 4-1/4 inches with black mat cut at 5-1/4 x 4 inches. Congrats layer was already die cut in the kit and measures 5 x 3-3/4 inches. Black patterned paper is from It's My Party DSP stack from Stampin' Up. Since the card is for a girl, I added a little bling with some rhinestones on the hats. I also lined the envelope by cutting a piece of the same DSP to 5 x 5-1/2 inches and inserting it into the envelope. Fold down the DSP for the flap, add adhesive, and then fold down the envelope flap on top of it to adhere. There is no need to glue down the entire liner, just flap to flap.
Next week I am starting a birthday card series so I hope you come back to check that out!
Friday, April 22, 2016
Mother's Day Card #2
 |
| Black & White Mother's Day Card |
Thanks for stopping by! See you again next week!
Friday, April 15, 2016
#Mother's Day Card
The card I'm sharing with you today is not made with patterned paper! It is stenciled using the Papertrey Ink Color Pop Florals, a Make It Market Mini-Kit. I haven't really stenciled much before, but the process is very easy and I enjoyed it a lot, so I just had to share it! The set comes with 3-step stencils plus stamps and dies! You also get some printed flowers to cut out or die cut and card bases to stencil or stamp your flowers on. I chose to work with a blank white card base, mainly because I thought I would just be practicing, but since it turned out so well I used it for my card! I hope you like it. (Sentiment is from Teeny Tiny Wishes by Stampin' Up). Finished card size is 5-1/2 x 4-1/4 inches. Stenciled panel is 4 x 5-1/8 inches which is layered on top of a piece of cardstock cut about 1/16th inch larger on all sides than the stenciled panel.
I was so impressed with this kit that I am sharing the link to Papertrey Ink and also a link to Papertrey's video demonstrating the process. It is a great set and very reasonably priced. They also have a new mini-kit called Color Pop Butterflies coming out soon! I think you'll want to check it out!
Link to video on YouTube
Link to Color Pop Floral Kit
Link to new Color Pop Butterflies Kit
Have a good week!
Lana
Saturday, April 9, 2016
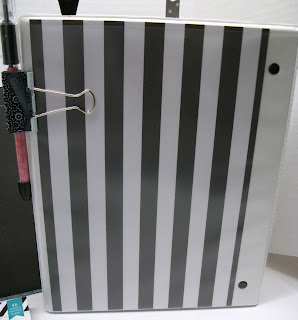
DIY Personal Planner
 |
| I used a stamp to create this divider page. |
 |
| I created more pockets for business cards in the address book section. I have since discovered that Avery makes page protector sheets to hold business cards. |
 |
| I also created a section to keep track of birthdays. |
 |
| I have a section for notes, using the Avery small notebook paper. |
 |
| I decided to add a small paper bag for holding receipts, small items, etc. |
Saturday, April 2, 2016
Alternative Card Using March's Paper Pumpkin Kit
I have a short post this week. I LOVED this month's Paper Pumpkin Kit from Stampin' Up! I thought the envelope gift card enclosures were pretty enough to be the focal part of a card so I cut the envelope apart, using the largest inside piece for my card, and one of the flaps for an inside piece to decorate my envelope. It kind of looks like a faux lining. The center circles are from a prior Paper Pumpkin Kit. This is one of my favorite color combinations (Bermuda Bay and Cucumber Crush). These cardstocks are not part of the kit, but those are the colors in the patterned paper. The kit comes with white card bases with a soft pattern on them which could be used instead.
I'm no longer a demonstrator, but I'm sure any of them would be happy to help you subscribe to Paper Pumpkin or answer your questions. It's a surprise every month. Link to Paper Pumpkin website
Happy crafting. I'll be back next week with another card or project for you. Have a great weeked!
Subscribe to:
Posts
(
Atom
)


