My passion is making cards and other paper projects and sharing my ideas and projects with you.
Friday, November 3, 2017
Christmas Planner
I wanted to share my Christmas Planner with you. I actually made this Christmas Planner last year and really liked it, so I updated it this year using sheets I purchased from Polka Dot Posie Prints on Etsy (see link below). I wanted to share it with you in case you are looking for a simple and cute way to make a Christmas Planner.
I removed my sheets from last year and added a section in the back of the planner for prior years. This way I can always look back and see what I did the previous year. The rest of my planner is the same as last year with the same dividers I made using Christmas scrapbook paper cut to size and adding handmade tabs. (I decorated both sides of the divider pages.)
This is my planner open. There is a pocket inside the binder cover for a post-it-note pad, lists, etc. I decorated the inside cover page using scrapbook paper, die cuts, stickers, and stamps.
The first section I added was a To-Do List (a printable from the Etsy Shop):
I took an undated Avery calender insert and added the dates for December and inserted it into my planner behind the To-Do List, adding a tab so I can flip to it easily.
Next comes the Gift List section. I decorated the divider with washi tape and stickers.
This is one of the printable lists from Etsy:
My next section is for on-line orders. I do a lot of on-line ordering and want to keep track of the orders, the recipient, when they are expected to arrive, date of arrival, etc.
There is a printable for this section as well:
The next section is my Christmas Card List:
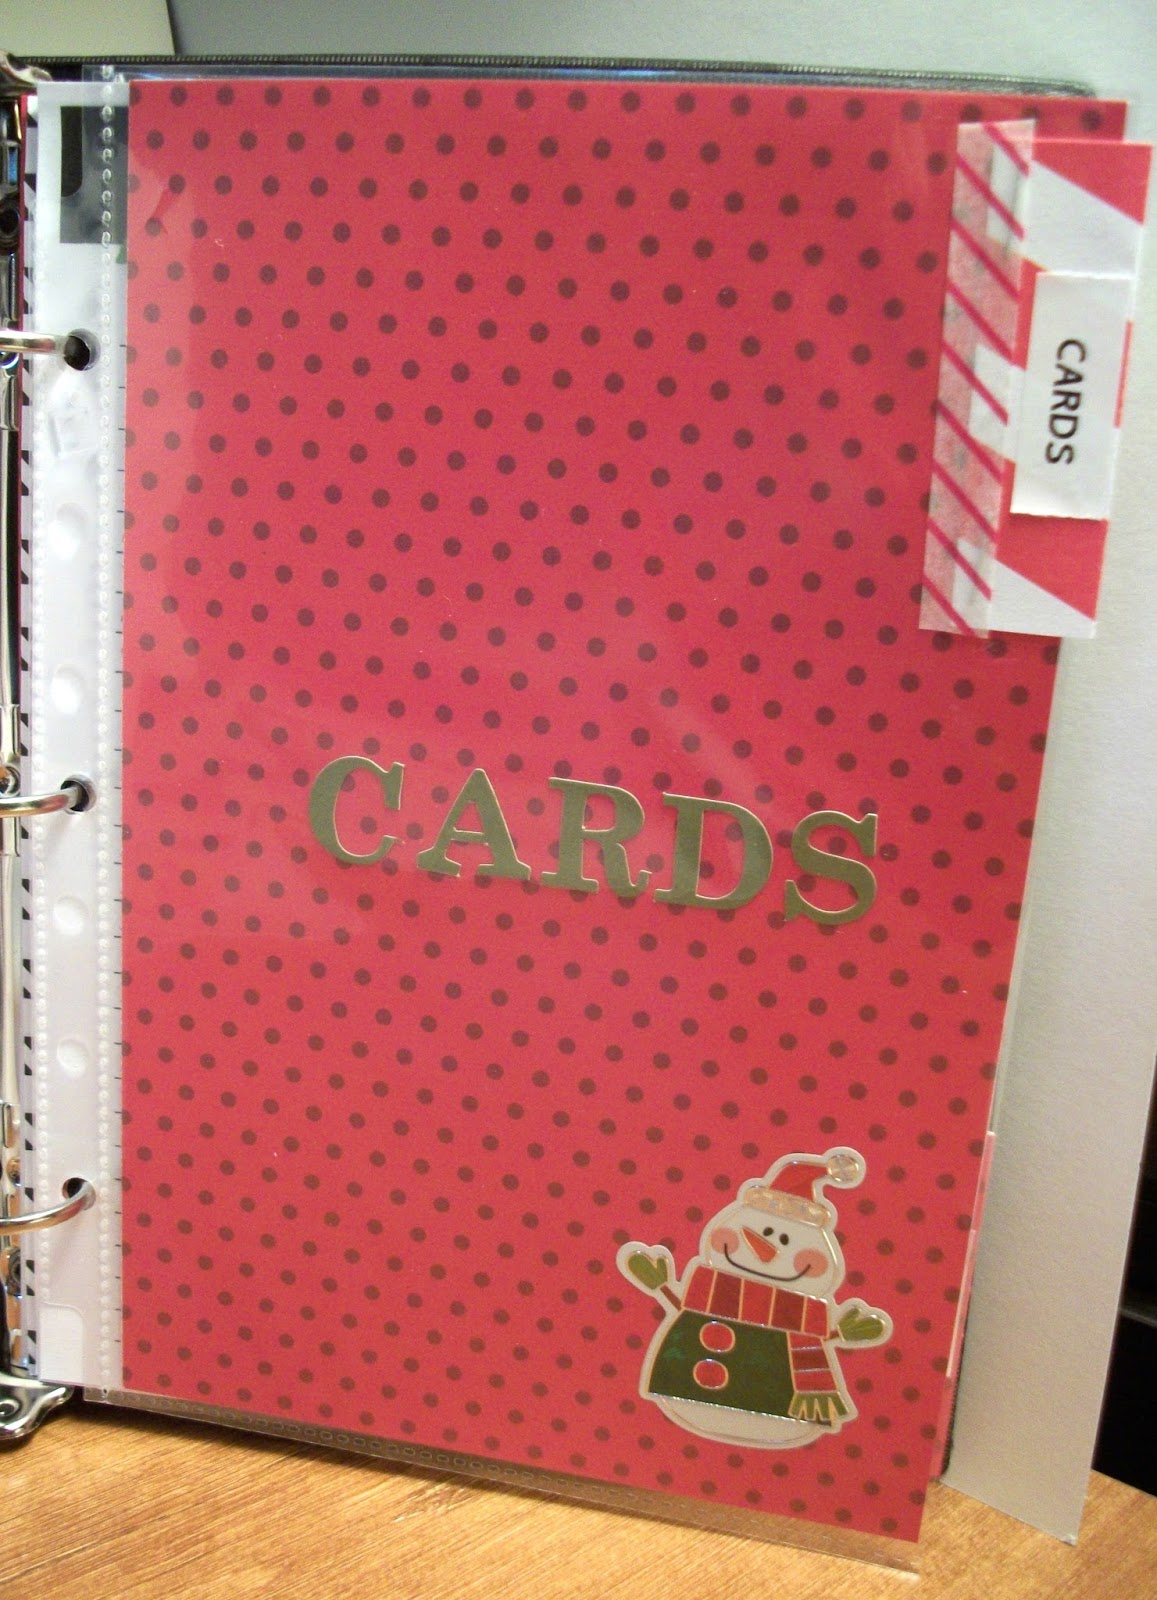
And again, another printable:
There is also a menu section:
and another cute printable:
Finally, I used a premade Avery pocket that I decorated to keep all my receipts in:
Products Used:
The Avery Binder (7 x 9 inches), pockets and accessories can be purchased almost anywhere, including Walmart. I purchased the printable inserts from Polka Dot Posie Print Etsy Shop and I absolutely LOVE them! They come in X-Small, Small and Large (8-1/2 x 11). I purchased the Small which prints 2 pages on an 8-1/2 x 11 sheet of paper and fits my Avery notebook perfectly. The categories also fit in perfectly with what I had already set up last year, but in a much cuter presentation!
I'm ready for the season! Now back to card making and projects!
Note: I also made a personal planner using another Avery notebook in the same way. Click here to see that planner.
Friday, October 27, 2017
Coffee Treat Holders for Halloween
This little Witches Brew K-cup holder is just a 2 x 2 inch square box covered in DSP and wrapped in orange, black and white twine. I used paper and stamps from Stampin' Up, added some black crinkle paper, and a K-cup! (To make a 2 x 2 inch box, cut a piece of cardstock to 6 x 6 inches and score at 2 inches on all 4 sides, cut on score lines and assemble.)
This treat holder is a small milk carton made with directions from Pootles.co.uk (click here). I made the carton using orange cardstock and covered it with panels of Halloween Night DSP from Stampin Up (2016). I mixed a couple stamp sets to get the stamped "Everything pumpkin", die cut it out using a stitched oval shape, then hand cut and added a little pumpkin from the same DSP. I tied some black twine around the carton. This little carton will also hold a K-cup or some small pumpkin candies, tea light candles, etc. The carton is held closed with a gold library clip.
I made this small treat bag using orange and white polka dot paper. You can use a die to create the bag or make your own. (To make your own, start with a piece of paper cut to 7-1/2 x 5-3/4 inches, scoring at 1-3/4" and 5-1/4 inches on the long side, then turning the paper and scoring at 1/2 inch on the side that will be the bottom, which is important if it's directional paper. Fold on score lines, trimming away all but the middle section on the bottom. Adhere the bag together. You can use decorative scissors to cut a small strip from the top of the bag.)
I added a tag cut from a calendar page (see my post dated October 6, 2018 where I turned calendar pages into cards and projects), added some twine, a stamped and cut out image of a coffee cup, a witch's hat, and a greeting from the same Stampin' Up stamp set. I attached the tag to the bag using a heart shaped black paper clip. Inside the treat bag is a packet of mocha latte coffee.
Here is another idea. You may have seen these cute little coffee cup candles at Dollar Tree. I removed the label it came with, traced out a new one in kraft cardstock, and attached it instead. Then I added the greeting, cup and witch's hat. Very little effort for a cute effect!
Halloween doesn't have to just be for kids you know!
Supplies Used:
Pumpkin Pie Cardstock from Stampin' Up
Kraft Cardstock from Hobby Lobby
Polka Dot paper from Stampin' Up (retired)
Spooky Night DSP from Stampin' Up (for witch's hats)
Halloween Night DSP (Stampin' Up - 2016)
Merry Cafe Stamp Set from Stampin' Up
Celebrate Everything Stamp Set from Paper Pumpkin (April 2016)
Stitched Shapes Framelits from Stampin' Up (oval)
Thursday, October 19, 2017
Grateful for You - Stampin' Friends Blog Hop 2017
Welcome to Stampin' Friends Blog Hop for October. This month we are creating giving thanks or Thanksgiving cards and projects.
I created this card by embossing some Early Espresso Cardstock with a fall leaf embossing folder, adding a small border at the bottom using a borders die, and making a pumpkin using several layered ovals cut with stitched dies. I added some die cut leaves, the "grateful" word die, and stamped "for you" onto a small hand cut white banner. For the picket fencce, I cut some strips from wood textures paper, dog-eared the tops, and laid them out in a picket fence pattern.
Supplies Used:
Early Espresso Cardstock - Stampin' Up
Crumb Cake Cardstock - Stampin' Up
Wood Textures DSP Stack - Stampin' Up
Embossing Folder - Paper Studio
Hello Fall Paper Pad - Carta Bella
"Grateful" die cut - Taylored Expressions
Leaf Diecuts - Lawn Fawn
Stitched Hillside Borders - Lawn Fawn
Stitched Shapes Framelits - Stampin Up
I also made a little "wooden crate" to go along with my card. These would make perfect table favors for Thanksgiving!
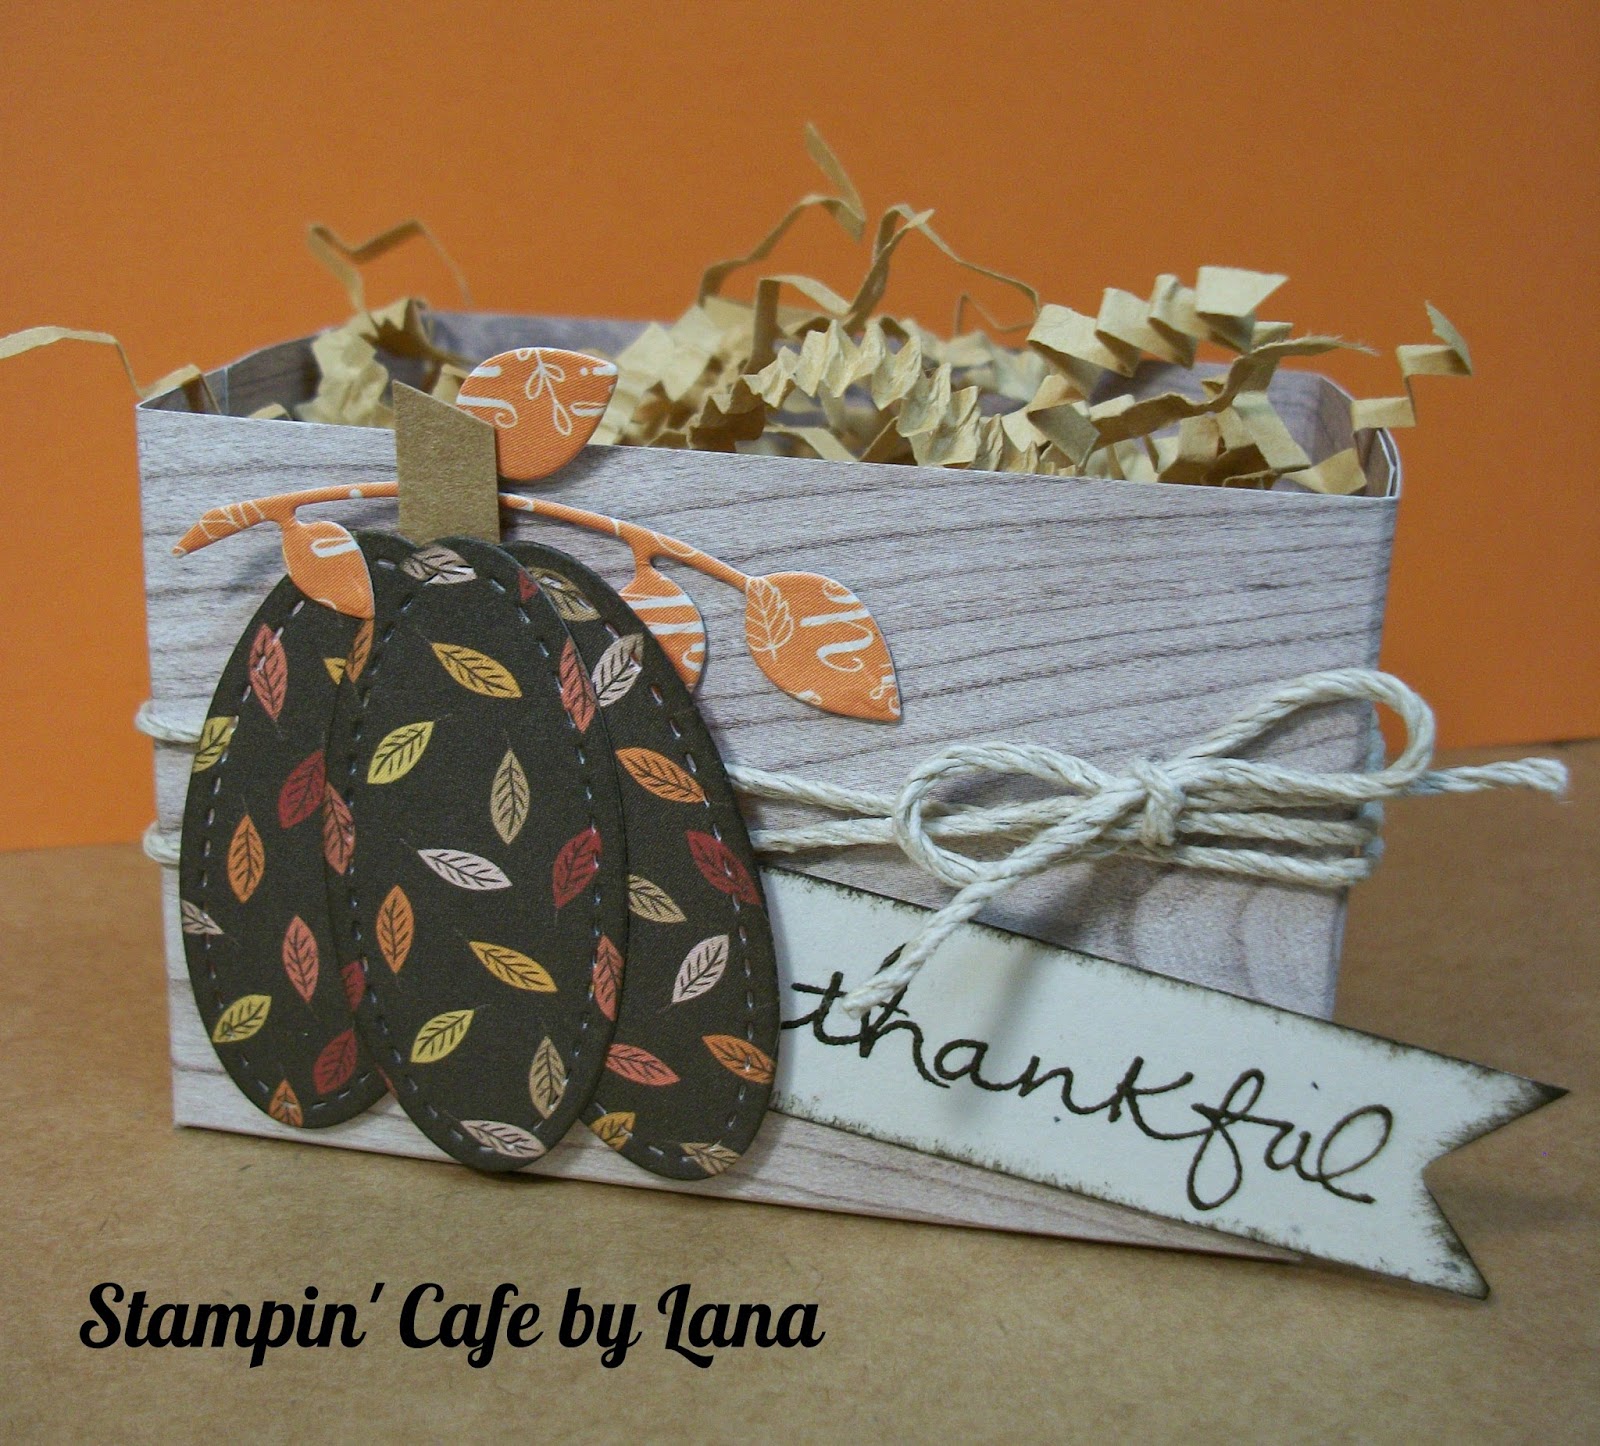
I made the same oval layered pumpkin, added some die cut leaves and a "thankful" banner. I added some crinkle paper to the inside of the crate, and tied some twine around it. You can use a die cut for the crate or hand make one with a 6 x 6 piece of wood textures paper, scored at 1-1/2" and 4-1/2" on one side and at 2" and 4" on the other side. Either way, it creates a darling little "wooden crate".
Supplies Used:
Wood Textures DSP Stack - Stampin' Up
Hello Fall Paper Pad - Carta Bella
Leaf Diecuts - Lawn Fawn
Endless Thanks Stamp Set (retired) - Stampin' Up
Stitched Shapes Framelits - Stampin Up
There is a Giveaway this month! Comment on the blogs with the hashtag as shown below and have a chance to win this super kit!
Now come follow along with the other hoppers to see what they have created for you this month!
Friday, October 13, 2017
"I Have My Eyes on You" - Halloween Card & Treat Box
I was shopping at Dollar Treat a while back and saw a cute Halloween decoration featuring a jar full of eyeballs with the words "I have my eyes on you!" The cardmaker in me saw a card in the making!
My card is the standard A2 size card, top folding, using black cardstock. I then added a layer of white, then lime green, and then a piece of striped cardstock in Halloween colors.
I stamped and cut out a Mason jar image and added the googly eyeballs purchased at Dollar Tree. I tied some black twine around the jar top and added it to a stitched die cut purple circle with dimensional adhesive. That circle was then added on top of a lime green circle, and then onto a black one.
I attached two more stitched circles in smaller sizes behind the circles the Mason jar is attached to. I added two larger colored googly eyes to the orange circle. All the circles are cut using Stampin' Up's Stitched Shapes Framelits.
I made the word sentiment on my computer using the BaaBookHmk font in Word (size 20), printed it out on white cardstock, and then cut it down, flagging one end. I added a small scrap of orange patterned cardstock at the bottom edge of the flagged piece.
I then created a small Halloween treat box using the same image, googly eyes and stitched circles. It is a gable box purchased at a craft store. It has been in my stash for awhile so I can't really tell you where it came from, but you can use any treat boxes you may have. I used the same striped paper to decorate the all white box and made the same sentiment on my computer, just making the font smaller (size 16). The box is held closed with a small gold binder clip.
Friday, October 6, 2017
Cards and Gift Packaging Using Calendar Pages
I have been collecting my used Lang Coffee Calendars by Lisa Kaus for years! I just can't bring myself to throw them away. I have used them before for several flipbooks, but otherwise they have sat idle in my craft room waiting to be brought back to life!
While I was cleaning out my papers a few weeks ago, I came across the stack of calendars dating back to 2011 and decided I had to put them to use! I love the artwork so much and have framed a few over the years, but I wanted to do something different. I decided to see if I could make some cards. That then led to a notepad cover, gift packaging and bookmarks! The possibilities are endless!
To make a card, I took a piece of clear plastic (window sheet material, heavyweight cellophane bag, etc.) cut to about 4 x 6 and placed it on various areas of the calendar page. When I found an area that would make a good card, I marked it and cut it out. From there, I found cardstock to coordinate with the prints, trimmed down the image where needed, and made a card! I even used scraps to stamp the greetings on.
Then I took one of my fold top kraft bags and decorated it. I cut out the coffee cup image and then hand cut the J, A, V and A to add on top of the image. I wrapped some twine around the bag and added a small corrugated tag to complete the bag!
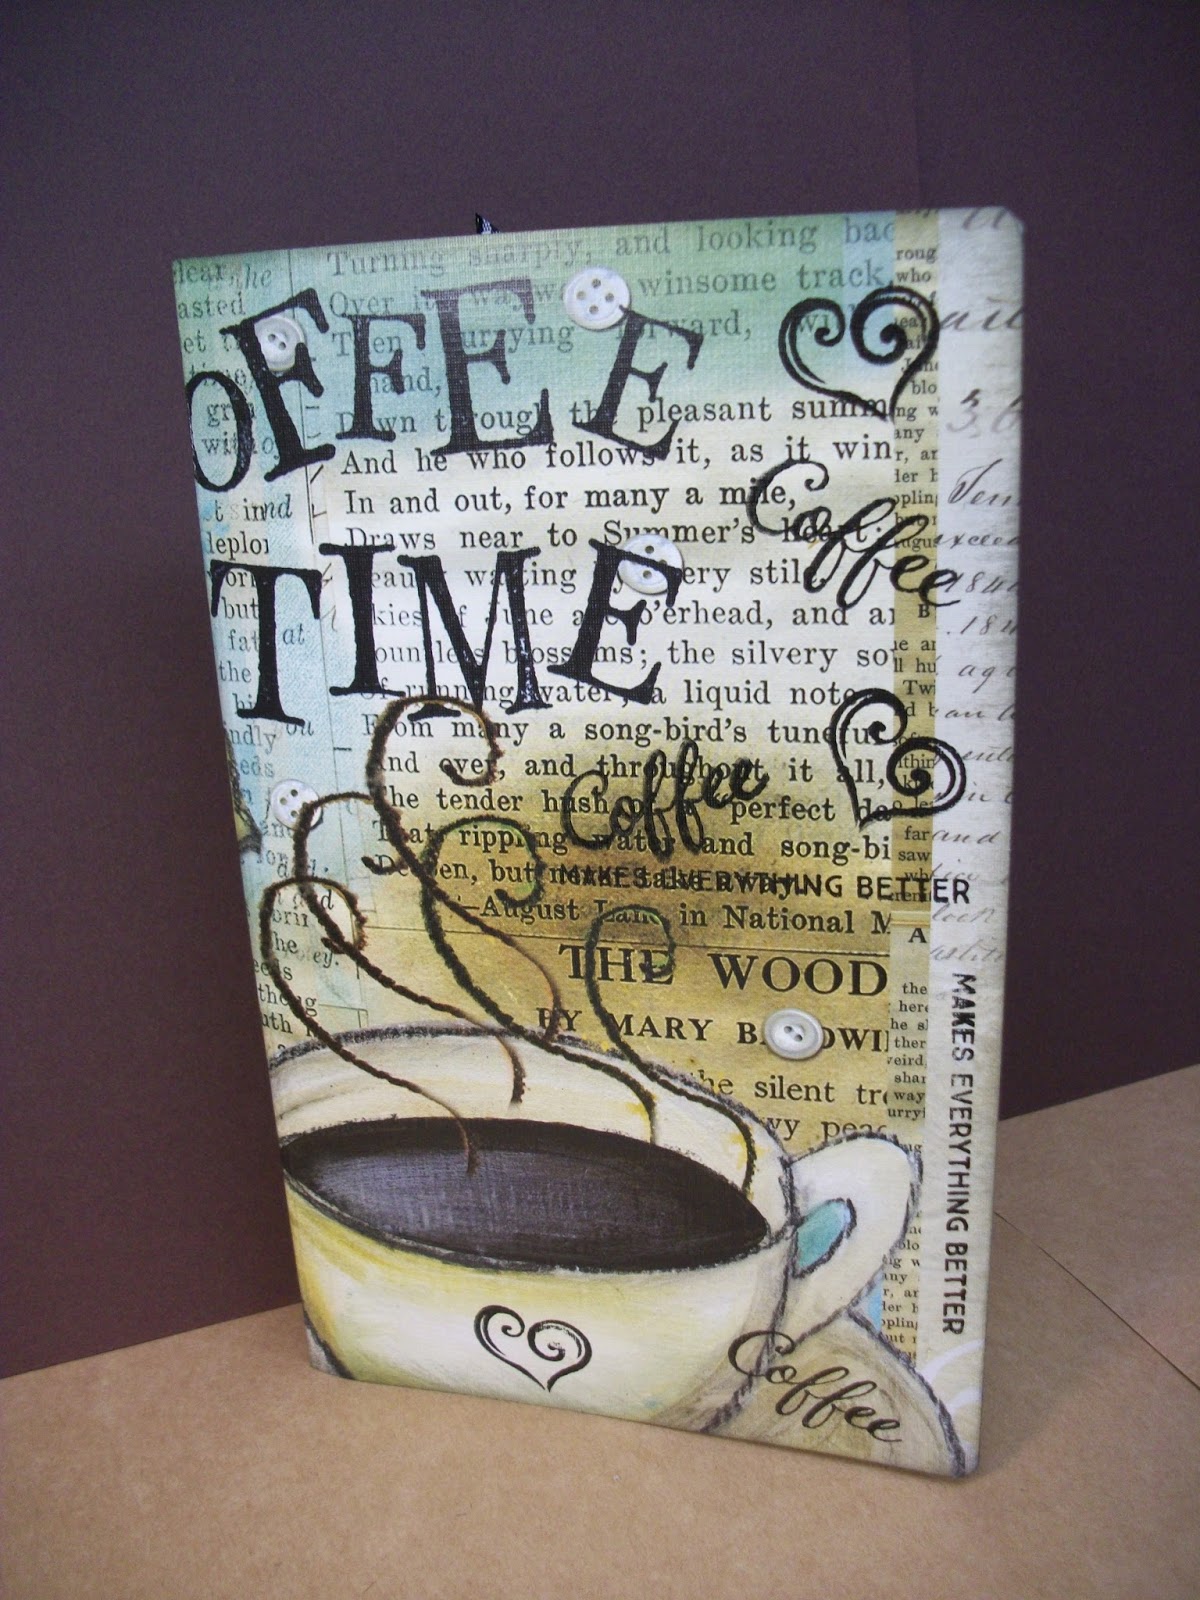
I also made a notepad cover. (I am not including directions because there are a lot out there already.) I stamped on the front and made a small pocket for the inside. I covered the white part of the notepad with another piece of the calendar page. You can cut and piece and decorate to your heart's content!
This is what the notepade looks like open, from the back.
I also made a matching bookmark. I just glued a piece of the calendar onto a tag I cut from kraft cardstock.
As you can tell, this can become addictive! I spent an entire weekend creating cards and projects and I still have plenty of calendar pages left! It is a really fun project. Don't throw this year's calendar away! Put it to good use and see what you can create!
Friday, September 29, 2017
Dinosaur Scrapbook Page
Since I am a scrapbooker as well as a cardmaker, I thought I would share this dinosaur birthday scrapbook page I made for my granddaughter recently. Her birthday party was dinosaur themed.
I used papers from Stampin' Up called It's My Party from last year's catalog, along with coordinating solid colors in Melon Mambo, Crushed Curry, and Mint Macaron.
The dinosuar is a Cricut cut from the Create a Critter Cartridge on p. 50, along with the "DinoMite" phrase on p. 51. I cut the layers in the same Melon Mambo, Crushed Curry, and Mint Macaron cardstock. I also die cut some balloons using dies in various shapes in the same coordinating colors and papers. The "DinoMite" is cut in Melon Mambo and layered onto a white circle, and then onto a larger stitched circle in Crushed Curry using the Stitched Framelits by Stampin' Up.
The balloons were added to a striped tag I had in my stash.
I matted the photos in Melon Mambo and other patterned papers from the stack.
I will try to share more scrapbook pages in the future. Next week I have a cool project for you. I will be recycling some old calendars! I hope you will come back then!
Friday, September 22, 2017
Hello Fall - Pumpkin Spice Latte Card
Even though the weather where I live is hot today, it is still the first day of fall, my favorite season! I am celebrating with this Hello Fall Pumpkin Spice Latte card!
The card is made using a crumb cake card base, top folding. I added the pumpkin pie layer that I embossed with a fall leaves embossing folder from Darice. The coffee cup and greeting are from the new Merry Cafe stamp set by Stampin' Up! The patterned paper for the cup is from the new Painted Autumn DSP by Stampin' Up. I hand cut a band from a piece of crumb cake cardstock that I ran through my crinkling tool, tied some linen thread around the cup, and added some stamped and cut out orange leaves and a small crinkle cut heart. The circles and ovals are from dies and punches.
Enjoy Pumpkin Spice Latte Season! I know I will!
Note: All colors used for this card are from Stampin' Up - Crumb Cake, Pumpkin Pie, Early Espresso and Very Vanilla.
Friday, September 15, 2017
"Nuts About You" Fall Card
This "Nuts About You" squirrel card was made for my 5-year-old granddaughter. She loves the squirrels in our backyard and collecting the acorns that fall from the neighbor's oak tree. She also likes jokes, so I thought this would be a fun card for her!
The card base is 4-1/4 x 5-1/2, top folding, in kraft cardstock. I added a layer of pumpkin pie colored cardstock and then a layer of fall trees patterned paper from the Carta Bella Hello Fall 6x6 Paper Pad. This is such a versatile pad, all double-sided papers, and a nice weight!
The squirrel is from the Cricut Create a Critter Cartridge, p. 32, cut at 2 inches. I also cut the coordinating acorns on the same page, inking the edges with brown ink. I also inked around the cut squirrel and added some small googly eyes. The squirrel was then added onto a scalloped die cut circle using another paper from the same Carta Bella paper pad, and that was layered onto a pumpkin pie colored circle, and then onto a burnt orange colored circle.
I chose not to use the "nuts about you" cut out from the same cartridge and instead printed it out on my computer. I cut it out using stitched framelits from Stampin' Up, first in white, and then in the pumpkin pie color. I added another cut acorn and two small orange enamel dots. I flagged it with a small strip of paper from the same Carta Bella paper pad.
I think my granddaughter is going to love this card! She is a cardmaker and stamper as well. She even asked for her own stamp set for her birthday!
Friday, September 8, 2017
Pumpkin Patch Truck and Card
Some of you may remember when I made a Christmas card featuring this little truck and then a Valentine free-standing truck similar to this one. Well, I had to do it again! I was inspired by the patterned paper by Carta Bella called "Hello Fall."
My card is a standard 4-1/4 x 5-1/2 inch card, top folding, with a black card base. The Cherry Cobbler layer is cut at 4 x 5-1/4 inches and embossed with a fall leaf embossing folder by Darice. I cut a piece of the truck patterned paper at 2-1/2 x 4 inches and then cut a black mat slightly larger.
The truck is from the Cricut Everyday Paper Dolls Cartridge, on p. 71, cut at 1-3/4 inches in real dial size. The truck is a safari truck and is a little too long, so I cut the truck bed away from the truck behind the cab and trimmed off a small sliver. I inked all the edges of the two pieces in Cherry Cobbler ink and then reattached the two pieces together, overlapping the cab a bit onto the truck bed. I added 1/2 inch black circles for the tires and a 1/4 inch white circle for the wheel center, adding a small dot of ink to the centers. For the fenders, I cut a 1 inch circle in half, inked the edges, and attached them over the wheels, aligning with the bottom of the truck. I used a black marker to add a small black handle.
I attached the truck to the card using dimensionals and then layered my pumpkins behind the truck bed. I used the Cricut Create a Critter Cartridge, p. 70, on shadow setting, to cut the pumpkins, ranging in size from 1/2 to 1 inch, and inked the edges, coloring the stems with a brown marker.
I didn't have a "Happy Fall" or "Pumpkin Patch" stamp, so I created these on my computer in Word. I used the BaaBookHmk font. The greetings are both die cut using the Stitched Framelits by Stampin' Up and layered onto the card. I added a hand cut banner behind the "Hello Fall" stitched shapes.
The directions for the truck can be found in my previous Valentine truck post. (See the link below.) It measures 1-1/2 inches wide and approximately 4-3/4 inches long. I didn't add all the extras like I did on the Valentine truck, I just kept it simple. I added some little marshmallow creme pumpkins (one of my fall favorites!) to the truck bed. As long as you use a heavyweight cardstock, it will hold the pumpkins okay. Just don't put in too many. I also added the "Pumpkin Patch" words printed from my computer and cut them out.
I hope you enjoy both of these first fall projects! I will have more to come in the following weeks. Fall is my absolute favorite season!
Here are the links to both previous posts with detailed directions if you missed them:
http://stampincafebylana.blogspot.com/2016/12/christmas-truck-cards.html
http://stampincafebylana.blogspot.com/2017/01/valentine-truck-treat-box.html
Friday, September 1, 2017
Pretty as a Daisy Birthday Card
For this card, I let the Delightful Daisy DSP from Stampin' Up be the star of the show! I matted the DSP onto a piece of Wisteria Wonder cardstock cut using the largest die from the Fancy Scalloped Rectangle Stackables by Lawn Fawn. I then layered that onto the card base of So Saffron colored cardstock. Finished card is 4-1/4 x 5-1/2 inches.
I combined several different stamps for this card. I love doing this! I used the "happy" from one stamp and the "birthday" from another.
When I was going through my stamps the other day, I came across a retired Stampin' Up stamp set called Send a Celebration from 2006. I hadn't used this set very much, so it was more or less a "new find" for me! I liked how the daisies in the stamp coordinated with the daisies in the DSP. I stamped it in black and then colored the flowers using the Wisteria Wonder and So Saffron Stampin' Write Markers. I cut it out using the Stampin Up Stitched Framelits and then added that onto a piece of So Saffron cardstock cut just a big larger.
The birthday greeting is die cut from the same Fancy Scalloped Rectangle Stackables by Lawn Fawn that I used to cut the larger scalloped layer on the card, and then layered onto a piece of Wisteria Wonder cardstock cut just a bit larger.
Stamp sets used for the greeting were Simply Stated by Catherine Pooler Designs and Endless Birthday Wishes by Stampin' Up.
Friday, August 25, 2017
Toolbelt Birthday Card & Matching Treat Box
My Dad is a retired carpenter, so I thought this toolbelt card and matching "wooden crate" treat box were fitting for his birthday!
The card base is 5-1/2 x 4-1/4 inches, top folding, in dark brown (Stampin' Up Early Expresso). The layer on top is cut to 5-1/4 x 4 inches, using one of the papers in the Stampin' Up Wood Textures DSP Stack.
For the toolbelt, I cut a piece of kraft cardstock at 5 x 2-1/2 inches, rounding the corners with a 1/2 inch corner rounder. For the pockets, I cut two pieces 2 x 2-1/4 inches, and rounded those corners as well. I used a 1-3/8 inch circle punch to punch out a small portion of the top on the 2 x 2-1/4 inch pocket pieces. I attached the pockets to the toolbelt using a very thin bead of glue around the two sides and along the bottom, leaving the top open.
I added two small belt loops on the side and in the middle between the two pockets. I used a 2-inch strip of kraft cardstock, lightly curling it with a pencil or bone folder. Just make it large enough to go around whatever you want to insert in the loop.
I used a dark brown marker (Stampin' Up Early Espresso) to make the faux stitching around the toolbelt and the pockets. I added some silver brads to the bottom corners of the pockets and the two top edges of the toolbelt. I attached the toolbelt to the card using dimensional adhesive tape.
I used some yellow washi tape that looks like measuring tape. I can't remember where I got it, but I checked on Etsy and there are several different ones available. I wrapped the washi tape around the wood DSP before attaching that layer to the brown card base.
If you have a tool die cut set, you can make a fast job of cutting out the tools you want to use. I didn't have any, so I looked on line for tool clip art, resized them, printed and cut them out. For the ruler, I just added some of the same measuring tape washi to a piece of cardstock.
The birthday sentiment is from the Tin of Cards stamp set by Stampin' Up. I used some letter stamps I had to stamp out "dad" and cut those out with a 1/2 inch circle punch, and added the letters to the bottom left pocket on the toolbelt.
The "wooden crate" treat box is created with a simple box construction. Finished box measures 2 inches high, 3 inches long, and 2 inches wide.
Start with a piece of kraft cardstock cut to 7 x 6 inches. Score at 2 inches on all 4 sides. On the 6 inch side, cut up to the score lines to form the sides of the box. Fold together and attach with glue or other adhesive. My punch wouldn't cut through all the layers of the sides, and I forgot to punch each layer first, so I simply punched out a small "handle" using a slot punch and glued it on each side of the crate.
To make the box look more like wood, I used a sponge and dark brown ink (early espresso) and sponged in streaks along all four sides of the box until I got the color and look I wanted. I added a piece of the yellow ruler washi tape around the box at the bottom.
Add any greeting you would like. I used a greeting from the Framed Love April 2014 Paper Pumpkin Kit. I cut it out using the Tags & Labels Framelits from Stampin' Up. I added some kraft colored crinkle paper and small candy bars (Hersheys and Twix).
I have seen other toolbelt type cards on Pinterest, but this design and measurements are what I came up with. It is not complicated. The most time-consuming part is making the tools.
I hope you enjoy these projects and will give them a try next time you need a masculine card or gift!
Friday, August 18, 2017
Pocket Birthday Cards
These pocket birthday cards were created using several Stampin' Up papers and cardstock. The pocket is hand cut and open at the top to insert a message, gift card, money, etc.
Each card is 4-1/2 x 5-1/2 inches, top folding. To make the pocket, I cut a piece of blue cardstock to 2-3/4" wide by 2-5/8" tall. At the bottom of the cut piece of cardstock, find the middle. Using a ruler, measure up diagonally on each side approximately 1/2 inch, mark and cut off the corners. I used a white gel pen to make the faux stitching, and added some punched out colored circles for "rivets." For the pocket tabs, I used the top of a die cut tag for the striped card and a small banner for the blue and red one. Attach the pockets to the card using a thin bead of glue or a thin strip of double sided tape to the two sides and along the bottom, leaving the top open.
Stamp and punch/cut out your greetings as desired. I added a die cut star to each card for embellishment. I also inserted a "To You" stitched tag inside the pocket on the striped card and a folded piece of lightweight red paper inside the blue and red card to look like a handkerchief. You could also insert a gift card or money!
Products Used:
- Stampin' Up Cardstock in Real Red for both cards.
- Stampin' Up Birthday Memories DSP for the first card, along with Pacific Point Cardstock for the pocket and partial front piece.
- Stampin' Up Color Theory DSP for the second card, along with Night of Navy cardstock for the pocket.
- Stampin' Up Tin of Cards stamp set for birthday greeting.
- Stampin' Up Perfect Pairings stamp set for the "To You."
- Stampin' Up Perfectly Wrapped stamp set for the dotted circle around the greeting on the striped card.
- Various die cuts and punches to cut out greetings, stars, banner for pocket, and tag top for pocket.
I plan on giving these cards to several teenage boys for their birthdays!
Friday, August 11, 2017
Summer "Beach Bag"
Here is a fun little bag for a summer gift! I made these type of paper bags back in 2015 (See that post here.) After I saw the darling papers in the PhotoPlay Summer Day Dreams Collection, I knew I had to make a summer version of the bag!
I used the flip-flops and sunglasses stickers from the pack to add to the front of the bag, attaching them with tiny white clothespins. (I adhered the stickers to cardstock and then cut them out.) The straps and base of the bag were made with a lime green cardstock from Stampin' Up called Lemon Lime Twist. Just choose any bright colored cardstock that coordinates with the paper. Both of the striped papers used for the bands of the bag are from the Summer Day Dreams collection.
The bag will hold a Post-It Notepad and pen, candy treats, small lotions, etc. I am going to add some pedicure supplies. Finished size of bag is 4-1/4 x 4-1/2 inches. With the handles, it stands approximately 8 inches tall.
This bag varies slightly from the bags in the post mentioned above in that I increased the height of the bag to 4-1/2 inches and made the handles a little taller. The base of the bag remains the same. There is a You Tube video by Ophelia Crafts that shows how to put the bag together. Click here for that video link.
Here are the directions for my Summer Beach Bag:
1. Make the base of the bag starting with a piece of colored heavyweight cardstock cut to 2-1/2 x 5-1/4 inches. Score at 1/2 inch on all 4 sides. On the long side, cut on the score lines up to the horizontal score line, fold and glue tabs to form the bag base.
2. Cut a piece of patterned paper to 4-1/2 x 12 inches. (Note: Double-sided paper works best so that the inside of your bag is pretty too.) Add sticky tape to the bottom and along one side of the 12-inch piece. Starting in the middle of one long side of the bag base, wrap this 12 inch piece around the base, starting with the side that does not have the vertical sticky tape attached. It will overlap slightly in the back when wrapped around. Remove the vertical sticky strip and attach to the rest of the wrapped piece.
3. For the bottom band on the bag, cut a strip of patterned or colored paper at 3/4 x 12 inches and wrap it around the bottom of the bag. Glue works best for this step.
4. For the handles, cut 2 strips of colored cardstock at 3/4 x 10 inches and attach on the front and back of the bag from the inside. Glue dots works best for this step. (Note: The handles won't show on the inside of bag because they will be hidden by the inside band.)
5. For the top band, cut 2 strips of patterned or colored paper at 1 x 12 inches and attach around the top of the bag, one on the outside and one on the inside. Glue works best for this step.
6. Decorate as desired!
Friday, August 4, 2017
"You're So Sweet" Summertime Popsicle Card
This is a popsicle card I made recently for an anniversary. It could easily be turned into a birthday or thank you card.
I used the Summer Daydreams Collection from PhotoPlay #thinktoremember. I used the Multi Dot and Popsicles paper from the collection. I cut the twin popsicles using the Cricut Doodlecharms cartridge, p. 43, cut at 2 inches. I inked around the edges in a darker pink color to add some shading. I layered the popsicles onto a 2 inch polka dot circle, then onto a 2-1/2 inch circle. I added two die cut circles in pink and peach behind the larger circles, and added dimensionals behind the popsicles to attach them to the card.
I used Stampin' Up! cardstock colors for the card, layering pieces, and circles in Flirty Flamingo, Peekaboo Peach, and Lemon Lime Twist. For the die cut circles, I used the new Dotted Circles Dies from Catherine Pooler Designs, plus a 1-1/2 inch punch to cut out the greeting.
I stamped the "you're so sweet" greeting using markers to ink the stamp from the You're So Sweet stamp set by Stampin' Up! and stamped the "together" in lemon lime twist from the stamp set Crazy About You from Stampin' Up!(now retired).
Finished card is 4-1/4 x 5-1/2 inches, top folding, with each of the colored and patterned paper layers cut 1/4 inch smaller than the previous layer. I added a couple brads from my stash that matched the colors pretty well! You could also use enamel dots or sequins, whatever you have on hand.
This makes a perfect summertime card for a lot of occasions with all the sherbet like colors!
Subscribe to:
Posts
(
Atom
)