

Then I decided to make a 3D version of the wagon. Here is the result!


 |
| Box Base for Wagon (See Helpful Hints Below) |
 |
| Page 73, Cricut Create a Critter Cartridge. Cut at 1-1/2 inches |
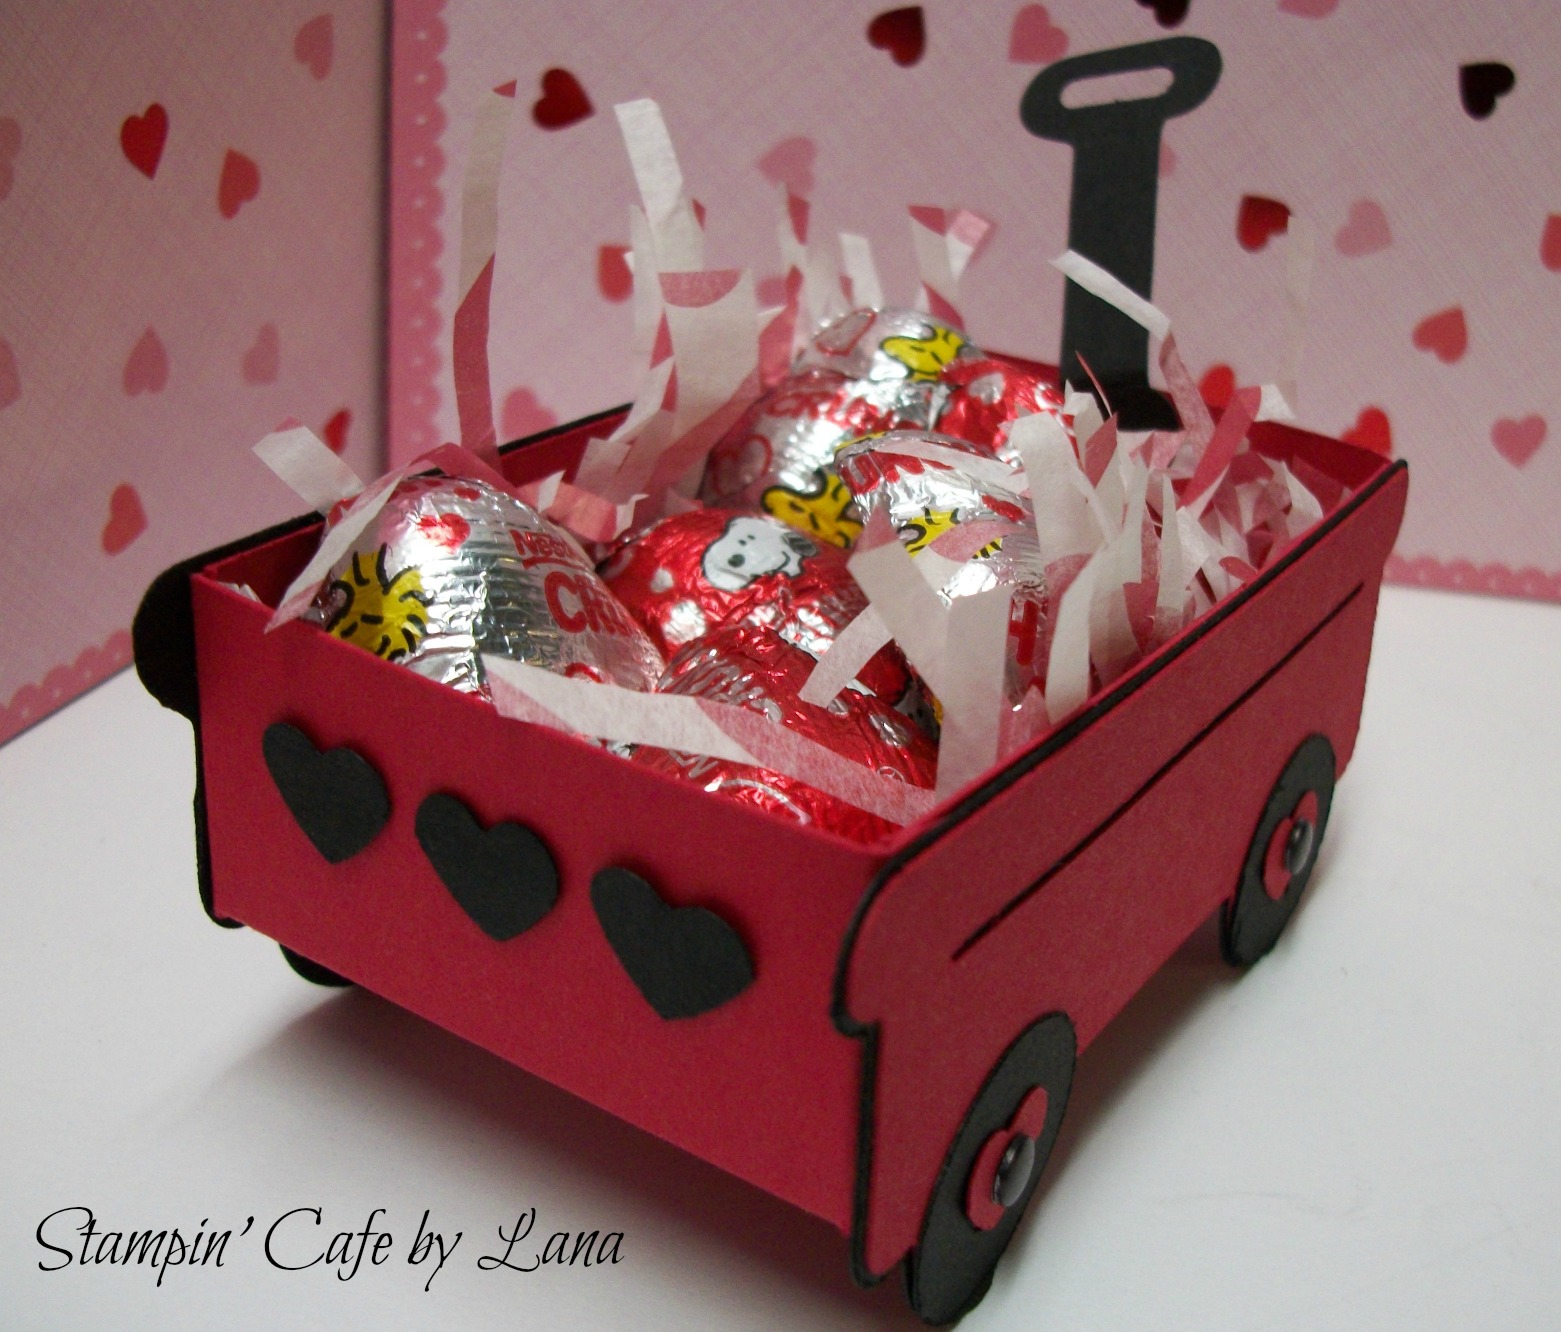
The wagon is found on page 73 of the Create a Critter Cricut cartridge. I have gotten more mileage out of this cartridge than any other I have. I just LOVE it! I cut the wagon pieces out twice for both sides of the wagon and made a box base to attach them to. (See photo above with cutting and scoring directions for box of wagon.) The Cricut wagon (all pieces) are cut at 1-1/2 inches. That is the height of the wagon sides. I did cut a third wagon shadow in black at 1-3/4 inches because I wanted a little larger handle to attach to the wagon.
After cutting the wagon shadow out of black, trim off the handles. The rest of the assembly of the wagon is just layering the pieces. First, the black shadow layer, then the red wagon layer, then the black wheels. I used punched out hearts for the wheel centers and then added black brads or "candy dots" in the center of each wheel. After the side pieces are assembled, assemble the box and attach the wagon pieces to the box base, making sure the sides of the wagon are level with the top of the box so the wheels will be below the box base. This makes the wagon free standing.
Helpful Hint: If you don't want the tabs on the box to show inside your wagon, just attach the tabs on the outside of the box base rather than on the inside like you would normally do for box assembly.
I attached the black handle (cut from the black shadow layer) to the front of the wagon on the inside with a small red brad and hid the prongs on the inside of the wagon with a punched out black heart. To make the handle look more life like, I used a small punch to cut out the inside of the handle (a retired punch from Stampin' Up). I then slightly bent the handle forward over the top of the wagon edge. I attached three black hearts to the back of the wagon. I think it would also be cute to write a child's name on the side of the wagon or use cut out letters, stickers, etc. Finished wagon size is 2 x 3-3/4 inches and stands 1-1/2 inches high.
I shredded and scrunched up some valentine tissue paper to add to the inside of the wagon and added some valentine candy. It will hold 6 Nestle Crunch hearts very nicely. It would also be cute with the little colored conversation hearts!
Have fun with this little red wagon!
ADORABLE!
ReplyDeleteADORABLE!
ReplyDeleteThank you, Sharon!
DeleteWhat a fabulous Valentine projects!! Love them both!!! Thanks for joining us at Cardz TV!
ReplyDeleteGerda
http://cardscreations.blogspot.com