Saturday, April 9, 2016

DIY Personal Planner

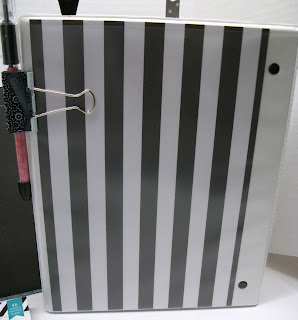
Front View of Planner.

I have been researching planners for a while now and it is a bit overwhelming! There are lots of planners I love and they either come with high price tags or you have to have a special punch to add anything of your own to them. After a lot of going back and forth, I decided I really liked the Heidi Swapp planners, but you have to have the special hole punch! Since I already had an adjustable 3-hole punch, I decided to try my hand at making my own planner and this is what I came up with. 

I bought a mini Avery 3-ring view binder in white, although they come in other colors. I purchased a Heidi Swapp (American Crafts) 12 x 12 48 sheet paper pad and went to work. I went through my pocket cards, clips, file folders and rubber stamps, and had a great time creating this planner for myself! I took apart a small calendar I had already started using for the year, punched holes, and added it to my planner. I will use the Avery version for next year's planner. I also purchased some small Avery page protectors to use for dividers. They are perfect because you can use any patterned papers you want. The notebook has a clear plastic cover so you can insert any decorative papers to design your planner. I did this for the front, back and side panel. 

Front Inside View

For the inside I added patterned paper to the pocket already provided on the left and to the inside cover of the notebook itself, then added some tags and a sticky note pad. I cut a black patterned file folder I already had to 8-3/4 x 6-1/4," decorated it with a cut out flower from the patterned paper, and added some washi tape to make the dashboard. On the other side of the dashboard I added more paper from the stack, a small calendar I already had on hand, and another tag. I made the pockets by folding some black cardstock and adhering it to the dashboard, and added some more washi tape along the punched edge. The calendar I had already been using had the very same pink color so I used those dividers as well in my planner. 
I used a stamp to create this divider page.

I created more pockets for business cards in the address book section.
I have since discovered that Avery makes page protector sheets to hold business cards. 

I also created a section to keep track of birthdays.

I have a section for notes, using the Avery small notebook paper. 

I decided to add a small paper bag for holding receipts, small items, etc. 

Back View of Planner

Since the notebook I purchased didn't come with a pen holder, I added a clip to the back cover and it holds my pen perfectly. There are other Avery notebooks that do have a pen holder attached. 

I think this is a great way to get a very personalized planner. I can still buy the cute accessories for planners and use them in my planner and I'm not limited to any particular brand. I think this will be a very fun ongoing project for the rest of the year! 

Here is a list of the Avery Products I used and a link to these and other items at Amazon

Avery Mini Durable View Binder #17116
Avery Page Protectors #77004
Avery 5-1/2 x 8-1/2 college ruled Filler Paper #14230
You can also get Binder Pockets in a 5 pack #75307
Avery 1 year Calendar Pages (undated) #14825

I was able to purchase my binder, notebook paper and page protectors at my local Walmart, but I had to order the other items. 


No comments :

Post a Comment